How to Install a Shower Mixer: A Step-by-Step Guide for Melbourne Homeowners
When it comes to home renovations, upgrading your bathroom is one of the best investments you can make. Installing a new shower mixer not only boosts the aesthetic of your space but also enhances the functionality of your shower. Whether you’re replacing an old mixer or adding a new feature, this step-by-step guide will walk you through the process with ease. This guide is perfect for Melbourne homeowners looking to take their DIY bathroom project into their own hands.
What is a Shower Mixer?
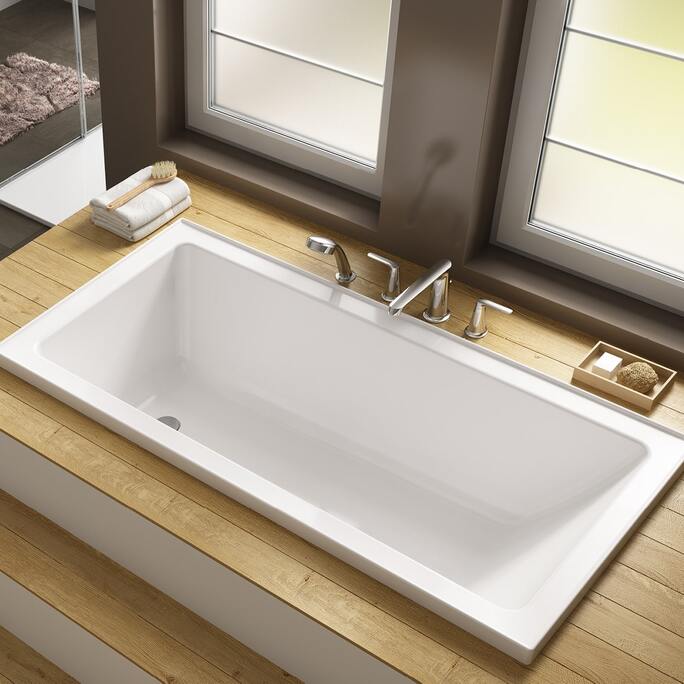
Before diving into the installation, it’s important to understand what a shower mixer is. A shower mixer is a faucet that controls the flow and temperature of water in your shower. By combining both hot and cold water sources, it allows you to adjust the temperature with ease.
Shower mixers come in various styles and finishes, but the installation process remains relatively similar across the board.
Tools You’ll Need for Installation
Before you get started, ensure you have all the necessary tools. Having the right equipment makes the process smoother and more efficient.
- Shower Mixer Kit (with all components)
- Wrench or Adjustable Spanner
- Plumber’s Tape
- Screwdriver (flathead and Phillips)
- Pipe Cutter (if necessary)
- Measuring Tape
- Spirit Level
- Plumbing Sealant
Step 1: Shut Off Water Supply
The first and most crucial step before starting any plumbing project is turning off the water supply. You don’t want to risk flooding your bathroom, so make sure you locate your water shutoff valve. This is typically found near the main water meter. Once turned off, open a faucet in another part of the house to relieve any pressure.
Before proceeding, make sure you're aware of Australian government regulations around water usage and efficiency. The Australian Government's Water Efficiency Guidelines offer important information that helps ensure you stay compliant while conserving water.
Step 2: Remove the Old Shower Mixer (If Replacing)
If you're replacing an existing shower mixer, begin by removing the old unit. Use a wrench or adjustable spanner to loosen and unscrew the connections. Be careful when removing the mixer, as there may be old sealing materials that could be stuck.
Step 3: Install the Shower Mixer Valve
Now that the old mixer is removed, it's time to install the new shower mixer valve. Follow these steps:
- Position the Valve: First, check the valve’s fitting against your wall to ensure it lines up properly with the pipework. Measure the distance from the wall to ensure it sits at the correct depth.
- Attach the Water Supply Pipes: If your new mixer uses threaded connections, wrap plumber’s tape around the threads to create a watertight seal. Connect the hot and cold water supply pipes to the valve. Tighten the connections by hand and then with a wrench, but don’t over-tighten as you might crack the valve.
- Secure the Valve: Use screws or bolts (depending on the design of your mixer) to secure the valve to the wall. Ensure it’s tightly fitted and doesn’t wobble.
Step 4: Install the Shower Mixer Handle
Once the valve is securely in place, you can install the shower mixer handle. Most shower mixer handles simply slip onto a spindle attached to the valve. Depending on the model, you may need to secure the handle with a small screw.
Step 5: Attach the Shower Hose and Head
If your mixer has a hand-held showerhead, now’s the time to connect the hose. Use the wrench to tighten the connection between the mixer and the shower hose. After that, attach the showerhead to the opposite end of the hose.
Step 6: Check for Leaks
Before you finish up, turn the water supply back on and check for leaks. Start by testing the shower mixer at different temperature settings. If you notice any dripping or leakage at the joints, tighten the connections slightly. You can also apply more plumber’s tape to ensure a watertight seal.
Step 7: Finish Up and Clean the Area
Once everything is working correctly and leak-free, clean up the work area. Wipe down the mixer, clear away any tools, and give your bathroom a quick tidy-up.
Tips for Maintaining Your Shower Mixer
- Regular Cleaning: Build-up of soap scum and limescale can affect the function of your shower mixer. Regularly clean your mixer with a non-abrasive cleaner to keep it in good condition.
- Check for Leaks: Every few months, inspect your shower mixer for any signs of leaks or loose connections.
- Descale: In Melbourne, where hard water can be an issue, using a descaling solution occasionally can keep your mixer functioning well.
For homeowners looking to make their bathrooms more eco-friendly, consider looking into water-saving tips from Sustainability Victoria to reduce water waste while keeping your shower mixer working efficiently.
When to Call a Professional Plumber
While installing a shower mixer is a relatively simple DIY project, there are instances when it’s best to call a professional. If you're unsure about the water pressure, if the existing plumbing is outdated, or if you're working with complex pipework, it’s safer to seek professional assistance. In Melbourne, licensed plumbers are available to help with more complicated installations and repairs, ensuring your new shower mixer works perfectly for years to come.
Conclusion
Installing a shower mixer can seem like a daunting task, but with the right tools and a bit of patience, it’s something many Melbourne homeowners can do themselves. By following this step-by-step guide, you’ll not only improve the look and feel of your bathroom but also have the satisfaction of knowing you’ve done it yourself.
If you're looking for high-quality shower mixers, taps, and other bathroom fixtures, Kalessi Bathroom and Tiles has a wide selection to suit every style and budget. Check out our range of premium products to elevate your bathroom today!
Related post
07
Jul

06
Jul
29
Jun
22
Jun