In-Wall Cisterns and Wall-Faced Toilets: What Maintenance Access Looks Like
A concealed cistern looks wonderful: a clean wall, a slim flush plate and no bulky tank. Then comes the doubt. If everything is hidden behind tiles, what happens the day it starts running or won’t fill?
The answer is calmer than most people expect. A well-planned in-wall cistern is built to be serviced from the front, through the flush plate opening. The trouble starts when access isn’t planned, such as tiles laid right up to the opening or an isolation valve that nobody can reach. This guide shows what access really looks like, what you’ll find behind the plate, and what to decide before the tiler arrives.
What Are In-Wall Cisterns and Wall-Faced Toilets?
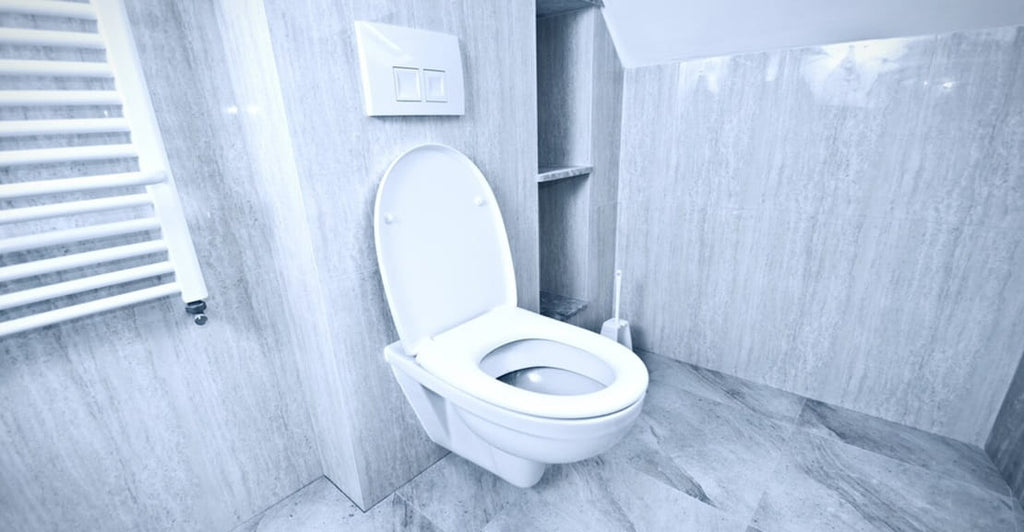
In short: An in-wall cistern is a flushing tank built inside the wall cavity, with only a flush plate visible. A wall-faced toilet is a floor-mounted pan that sits tight to the wall and is paired with that concealed cistern.
What Is an In-Wall (Concealed) Cistern?
Instead of a tank sitting on the pan, the cistern is housed in a frame or cavity in the wall. You see a flush plate with two buttons. Behind it sit the inlet valve (which fills the tank), the flush valve (which releases water) and the water connection. Concealed cisterns can also be placed in a ceiling void, a duct or a vanity unit.
What Is a Wall-Faced Toilet?
A wall-faced pan is mounted on the floor and pushed up against the wall, while the cistern is hidden in the wall behind it. By contrast, a wall-hung pan is fixed to the wall with a gap beneath it. Both typically use an in-wall cistern.
How Do They Differ From Back-to-Wall and Wall-Hung Toilets?
|
Type |
Pan sits on... |
Cistern location |
Access to cistern |
|---|---|---|---|
|
Back-to-wall |
Floor |
Visible unit sitting against the wall |
Lift the lid or remove the cover |
|
Wall-faced |
Floor |
Hidden in the wall |
Through the flush plate opening |
|
Wall-hung |
Wall (floating) |
Hidden in a wall frame |
Through the flush plate opening |
|
Close-coupled |
Floor |
Sits on top of the pan |
Lift the lid |
Why Do the Names Confuse Buyers?
Retailers use “wall-faced” loosely. Some suites sold as wall-faced are really back-to-wall suites with a visible cistern unit, while true wall-faced systems use a concealed cistern. Before you buy, ask one question: “Is the cistern inside the wall, and how is it accessed?” At Kalessi, our back-to-wall toilet collection is a good starting point if you want the flush-to-wall look without the cavity work.
Can You Still Reach an In-Wall Cistern After Installation?
Yes. A properly installed in-wall cistern is designed to be serviced from the front. Removing the flush plate usually exposes the inlet and flush valves, so most repairs don’t require cutting into tiles or the wall.
Access isn’t automatic, though. It depends on three things:
- The cistern model. Some are front-access only, while others offer front and top access.
- How the wall was finished. The flush plate opening must be left clear and correctly positioned.
- Whether the water isolation point is reachable. You need to be able to shut the water off first.
Industry commentary has long noted that the worry about concealed cisterns being hard to service is largely overblown when access is planned properly.
What Does Maintenance Access Look Like Step by Step?
Exact steps differ by brand, so keep your model’s manual. Here is the typical sequence:
- Turn off the water at the isolation (stop) valve for the cistern.
- Remove the flush plate. Depending on the model, it tilts out, slides to one side or is released by clips or locks.
- Remove the inner cover plate that sits behind it, if fitted.
- Lift out or unclip the flush mechanism to reach the valves.
- Inspect the inlet valve (check its filter for debris) and the flush valve seal (check for wear).
- Clean or replace the faulty part.
- Reassemble in reverse order, restore the water and test both flushes.
What Types of Flush Plate Open for Access?
- Tilt-out plates: Press the top and tilt the bottom away from the wall.
- Slide plates: Nudge slightly to one side to release.
- Clamped or locked frames: Release the locks, then the side clamps, before the plate comes off.
Take care with finishes. Tape or a soft cloth under your fingers avoids scratching a matte black or brushed plate.
What Is the Difference Between Mechanical and Pneumatic Flush?
- Mechanical: The buttons connect directly to the tank, so the flush plate must sit in a specific spot above the cistern.
- Pneumatic: An air hose links the buttons to the cistern, so the plate can be positioned at a short distance from the tank. Manufacturers specify the maximum distance for their models.
Either way, the tank still needs a service opening, so plan it with your plumber.
Which Parts Wear Out, and What Fixes Them?
|
Symptom |
Likely culprit |
Typical remedy |
|---|---|---|
|
Cistern keeps running or hissing |
Inlet valve or worn flush valve seal |
Clean the filter, adjust the float, or replace the part |
|
Slow or no refill |
Blocked inlet filter or partly closed stop valve |
Clean the filter, then open the valve fully |
|
Weak flush |
Low water level or damaged seal |
Check the level and replace worn seals |
|
Water trickling into the bowl |
Flush valve seal not sealing |
Clean the seat or replace the seal |
|
Buttons feel loose or stick |
Worn button mechanism |
Replace the mechanism |
Manufacturers recommend periodic cleaning of the inlet valve filter and replacement of the outlet valve seal when it wears. Check your product’s warranty terms too. For example, our AVERY suite listing notes separate warranty periods for ceramic, replacement parts and inlet/outlet valves (terms apply), so read our warranty page before ordering spares.
How Much Space and Access Do You Need Behind the Wall?
How Deep Does the Wall Cavity Need to Be?
In-wall cisterns are slim, but they still need room. Models commonly quote a minimum cavity of roughly 85 to 100 mm, depending on the brand and frame. Check the exact figure on the specification sheet and confirm it with your builder before framing starts.
How Should You Plan Access Around Tiles?
This is where most future headaches begin. Before tiling:
- Confirm the flush plate position against the cistern specification.
- Leave the opening clear. Don’t tile over it or grout it shut.
- Check the isolation valve location. The cistern’s water connection should be accessible.
- Photograph the wall frame before it’s closed in, so you know where everything sits.
- Keep the manual and model number in a folder or on your phone.
Planning with your tiler also helps your wall look right. See our bathroom tiles range for finishes that pair well with a slim flush plate.
What Do Victorian Rules Say About Access and Who Can Do the Work?
Three points matter:
- “Accessible” has a defined meaning. Under the AS/NZS 3500 water services standard, accessible means reachable for inspection, maintenance, repair or replacement, though it may first require removing an access panel or cover. A flush plate opening fits that idea.
- Isolation valves are required. The updated standard requires an isolation valve immediately before each flexible hose assembly connected to a cistern, among other fittings. See the BPC’s summary of the updated water services standard.
- Licensed plumbers do the regulated work. The BPC says to engage a licensed or registered plumber for plumbing work. It also notes that for plumbing work exceeding $750, a licensed plumber must issue a compliance certificate. You can verify credentials using the BPC’s find and check a practitioner tool.
Also check that the cistern is WaterMark certified. The ABCB explains what to look for when buying or installing toilets, and you can learn more at the WaterMark scheme site. For water efficiency, compare star ratings through the Australian Government’s WELS guide, or read the Wikipedia overview of WELS.
What Warning Signs Should You Watch For?
Catch problems early and a minor fix stays minor:
- A cistern that refills on its own or makes noise when nobody has flushed
- Constant trickling into the bowl
- Damp patches, bubbling paint or tile staining near the flush plate or on the opposite side of the wall
- A musty smell in the bathroom or adjoining room
- An unexplained rise in your water bill
Stop using the toilet, close the isolation valve if you can reach it, and call a licensed plumber if you suspect a leak inside the wall. Our bathroom fixture maintenance guide covers routine checks across the whole room.
Is an In-Wall Cistern the Right Choice for You?
It suits you if you:
- Want a flush, easy-to-clean wall and a minimalist look
- Have a small bathroom or ensuite and want to reclaim floor space
- Are renovating and can plan the wall cavity and tiling properly
Think twice if you:
- Can’t spare the cavity depth
- Are retrofitting into a finished wall with no scope for framing changes
- Want the simplest, cheapest repair path (a visible cistern is easier to reach)
A back-to-wall suite gives you much of the streamlined look with simpler servicing. Browse our toilets and bidets and back-to-wall suites, such as the AVERY wall faced suite, Black Wall Faced Toilet Suite or ASPIRE Back-to-Wall Suite. If you want a full concealed-cistern system, ask our team about options. For help comparing styles, see our toilet buying guide.
What Else Do Homeowners Ask About In-Wall Cistern Access?
Do I need to remove tiles to fix an in-wall cistern?
Usually not. Most repairs are done through the flush plate opening, provided the opening was left clear during tiling.
How do I remove the flush plate?
It depends on the model. Plates may tilt out, slide sideways or be released by clips or locks. Check your manual before pulling.
Can I replace an in-wall cistern valve myself?
Replacing internal parts may count as plumbing work, so check the rules. If in doubt, use a licensed plumber and ask for a compliance certificate where required.
How often does an in-wall cistern need servicing?
There is no single schedule. Inspect it when you notice symptoms, and clean the inlet filter and check seals periodically, following your manufacturer’s advice.
Are in-wall cisterns more likely to leak?
Not inherently. Leaks usually come from worn seals or poorly planned installations. A tank leak inside a wall can go unnoticed, so prompt attention to symptoms matters.
What is the minimum wall cavity for an in-wall cistern?
Commonly around 85 to 100 mm, but it varies. Check your model’s specification sheet.
Can an in-wall cistern be fitted behind a vanity or in the ceiling?
Some models can be installed in a duct, ceiling or under a counter, as long as the cistern stays accessible for servicing.
Is a wall-faced toilet the same as a back-to-wall toilet?
Not always. A back-to-wall suite has a visible cistern unit against the wall, while a true wall-faced system uses a concealed cistern. Always confirm what is included.
Is the Access Trade-Off Worth It?
For most renovators, yes, provided access is planned from day one. A concealed cistern gives you a cleaner wall, more usable space and a calmer-looking bathroom. The “hidden” part is only a problem when nobody thought about the service opening, the isolation valve or the tile layout.
Get those three right, keep your paperwork, and use a licensed plumber for the work. Your in-wall cistern should be one of the least troublesome parts of the bathroom.
Not sure which toilet style fits your wall?
Bring your plans or photos to our Springvale showroom, or send them through. We’ll help you compare options and flag access issues before you buy.
Browse our toilets and bidets · Contact our team on 0434 839 719 / (03) 9574 1988 · Visit us at 904 Princes Highway, Springvale · Follow us on Facebook
Related reading: Smart toilet buying guide · Energy-efficient fixtures · Bathroom showroom guide · Bathroom packages · Installation help · Trade accounts · Areas we serve
Related post
17
Nov
17
Nov
17
Nov
17
Nov